Removing the pipe from the old fitting

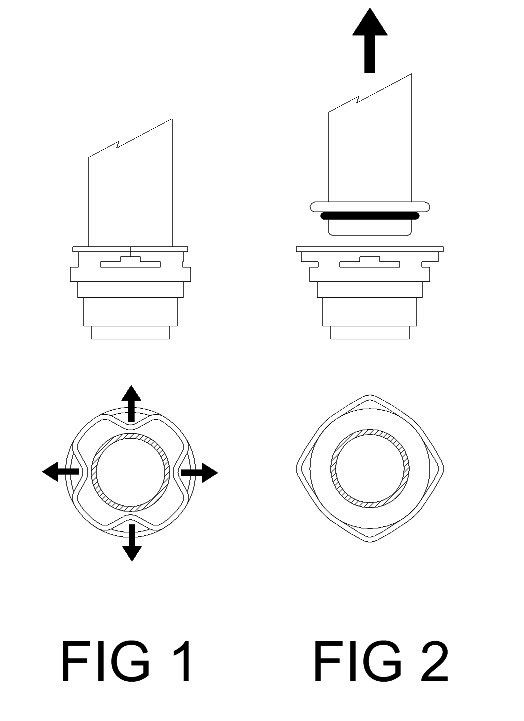
Carefully bend back the tags on the old fitting as shown in FIG 1. This will make the pipe loose enough to be pulled out.
The pipe should be pulled straight out of the fitting as shown in FIG 2 and not levered from side to side as this may damage the sealing surface.
Inserting the Pipe into the new fitting

Replace the old O ring with the new one supplied as shown in FIG 1 and lubricate it a little. Lubricating the seal is very important
Hold the heater in one hand, the pipe in the other and push the pipe squarely and firmly into the new fitting as shown in FIG 1. It may help to twist the pipe slightly whilst keeping it perpendicular to the fitting, but do not lever it from side to side. The O ring needs to be tight in order to seal properly.
Push down until the O ring has fully entered the fitting and there is no gap between the two flanges as shown in FIG 2. If you still have the heater in the heater box and try to push the pipe on you may not be able to apply the required pressure
The clip supplied can now be fitted and tightened. FIG 3
The pipes can swivel in the joint during fitting without affecting the seal.
If the above guidelines are not followed damage may occur to the O ring or sealing surface, it is therefore recommended that all joints be tested prior to fitting the heater matrix to the vehicle.
|

